Validate your data using a Checkpoint
Validation is the core operation of Great Expectations: “Validate data X against Expectation Y.”
In normal usage, the best way to validate data is with a Checkpoint. Checkpoints bundle Batches of data with corresponding Expectation Suites for validation.
Set up a Checkpoint
Let’s set up our first Checkpoint! Go back to your terminal and shut down the Jupyter Notebook, if you haven’t yet. Then run the following command:
great_expectations checkpoint new getting_started_checkpoint
This will open a Jupyter Notebook that will allow you to complete the configuration of your Checkpoint.
The Jupyter Notebook contains some boilerplate code
that allows you to configure a new Checkpoint. The
second code cell is pre-populated with an arbitrarily
chosen batch request and Expectation Suite to get you
started. Edit the data_asset_name to
reference the data we want to validate (the February
data), as follows:
yaml_config = f"""
name: getting_started_checkpoint
config_version: 1.0
class_name: SimpleCheckpoint
run_name_template: "%Y%m%d-%H%M%S-my-run-name-template"
validations:
  - batch_request:
      datasource_name: getting_started_datasource
      data_connector_name: default_inferred_data_connector_name
      data_asset_name: yellow_tripdata_sample_2019-02.csv
      data_connector_query:
        index: -1
    expectation_suite_name: getting_started_expectation_suite_taxi.demo
"""
You can then execute all cells in the notebook in order to store the Checkpoint to your Data Context.
What just happened?
-
getting_started_checkpointis the name of your new Checkpoint. -
The Checkpoint uses
getting_started_expectation_suite_taxi.demoas its primary Expectation Suite. -
You configured the Checkpoint to validate the
yellow_tripdata_sample_2019-02.csv(i.e. our February data) file.
How to run validation and inspect your Validation Results
In order to build Data Docs and get your results in a nice, human-readable format, you can simply uncomment and run the last cell in the notebook. This will open Data Docs, where you can click on the latest validation run to see the Validation Results page for this Checkpoint run.
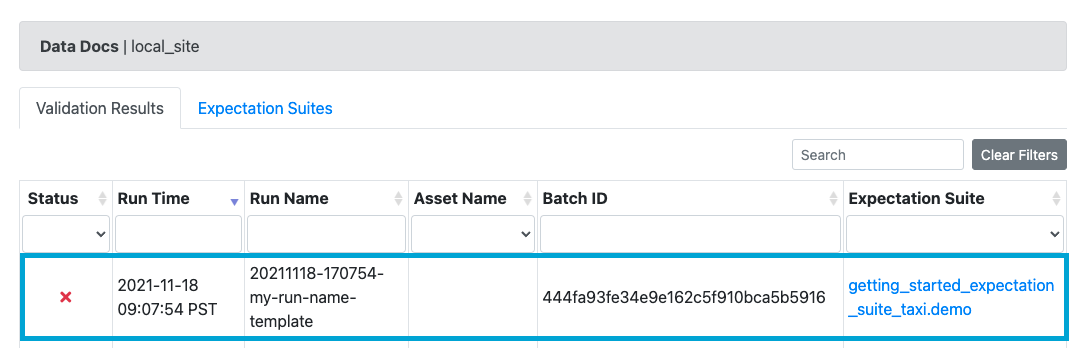
You’ll see that the test suite failed when you ran it against the February data.
What just happened? Why did it fail?? Help!?
We ran the Checkpoint and it successfully failed! Wait - what? Yes, that’s correct, and that’s we wanted. We know that in this example, the February data has data quality issues, which means we expect the validation to fail.
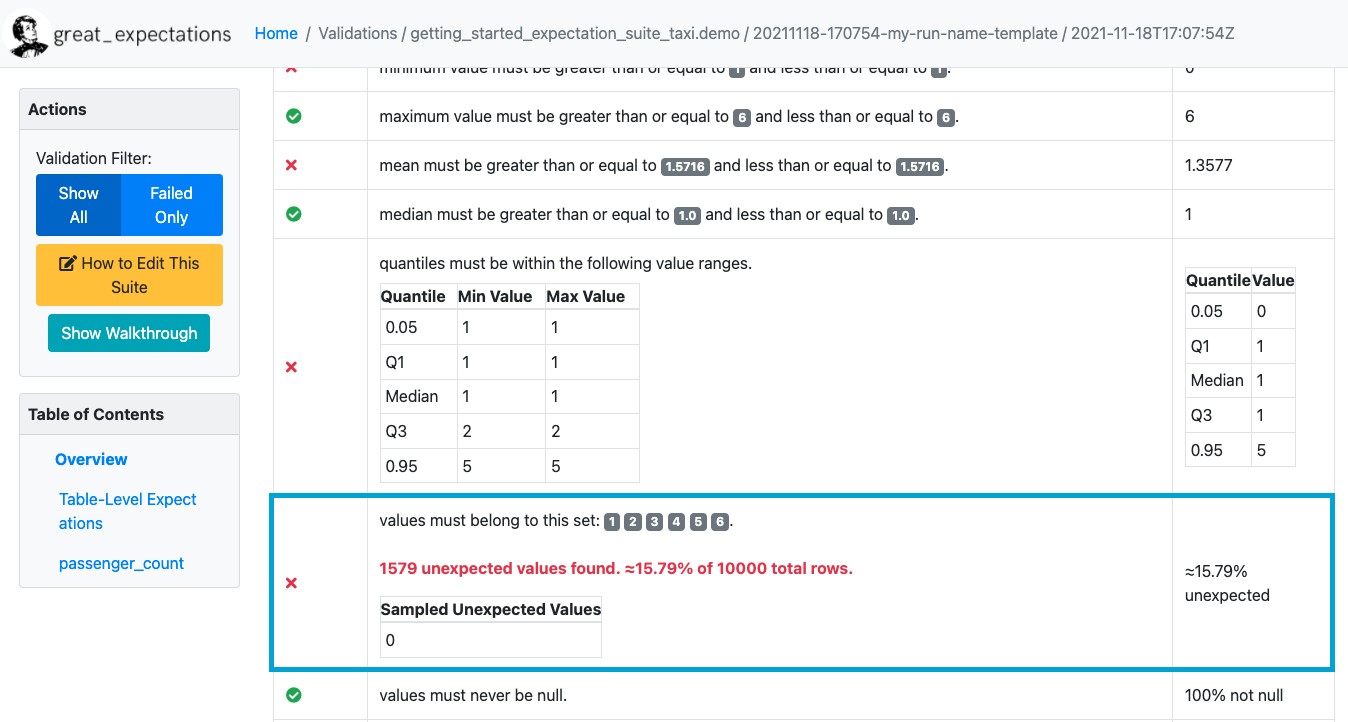
On the Validation Results page, you will see that the
validation of the staging data failed because
the set of Observed Values in the
passenger_count column contained the
value 0! This violates our
Expectation, which makes the validation fail.
And this is it!
We have successfully created an Expectation Suite based on historical data, and used it to detect an issue with our new data. Congratulations! You have now completed the “Getting started with Great Expectations” tutorial.
Wrap-up and next steps
In this tutorial, we have covered the following basic capabilities of Great Expectations:
Setting up a Data Context
Connecting a Data Source
-
Creating an Expectation Suite using a automated profiling
-
Exploring Validation Results in Data Docs
-
Validating a new batch of data with a Checkpoint
As a final, optional step, you can check out the next section on how to customize your deployment in order to configure options such as where to store Expectations, Validation Results, and Data Docs. And if you want to stop here, feel free to join our Slack community to say hi to fellow Great Expectations users in the #beginners channel!
Also, if you would like to view the full script used in this Tutorial, see it on GitHub: